
Table of contents
We always emphasize that the details make the difference and if they are handmade by the bride and groom themselves, they have an even more special charm. This is the case of these beautiful, tender, unique and personal envelopes for "tears of happiness" that will undoubtedly delight all your guests.
With a template to download to your computer and then print, as well as other basic materials, you can get in a few minutes your kit to the rescue of the weepiest of weepers. In addition, with custom labels and colors to your liking, you will captivate the attention of young and old with this original craft that will harmonize well in all weddings, regardless of their style. Usually it isThe name of the bride and groom, the date of the wedding or a generic drawing related to their love story are printed on the stencil.
Are you in, then, with this proposal DIY ( do it yourself Watch the videos below, follow the instructions, and you'll see how easy and simple it is to make your own "tears of joy" envelopes.
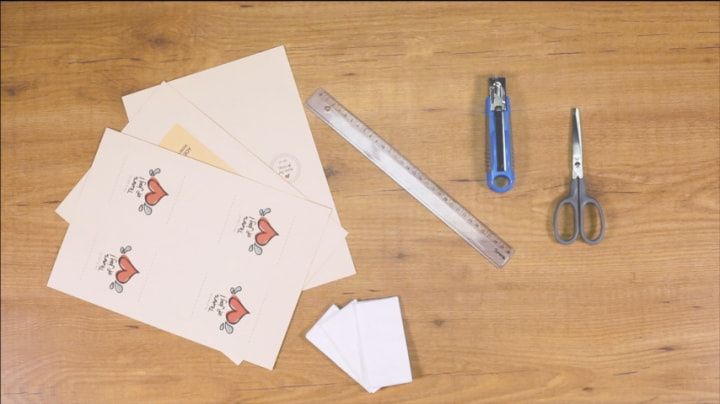
Materials needed
- A downloadable template
- A rule
- A cardboard cutter
- A pair of scissors
- Disposable tissues
- Ribbon or ribbon to tie
Model 1
Step by step:
1 Take the template in a rectangular shape and fold it inwards marking two equal sides. There should be a line in the middle.
Now rotate it and fold it inwards in the same way as in the previous step. But just mark and return.
Then, use the remaining marks to guide you and fold the four ends of the template, leaving a rectangle in the center.
Insert the handkerchiefs by mounting them right in the middle.
5 Then, on the resulting hexagonal shape, take one end and fold it inwards, until the ends meet. You will get the shape of an elongated envelope.
Finish the work by tying it with a ribbon or bow and make sure that the seal or the wedding signature is always visible.
Model 2
Step by step:
1 Cut out according to the shape outlined in the template, which in this case results in three tabs of the same size.
Take one with the bridal seal facing backwards and place the handkerchief on the bottom half of it.
Wrap the scarf with the top half and you're done.
Finish off your "tears of happiness" craft by tying it all together with ribbon.
Model 3
Step by step:
1 Take the downloadable template and cut it out according to the model, in this case, in four equal parts each with the drawing.
Always with the seal facing forward, make two cuts in the center with the help of a ruler and a cardboard cutter; above and below the bridal motif. The cuts should not reach the ends, although they should be slightly larger than the size of a disposable handkerchief vertically.
Finally, carefully insert the handkerchief through the slot and you're done. Finished handicraft
Let's get to work!
Still without the details for guests? Ask for information and prices of Souvenirs to companies near you Ask for prices